No-Churn Banana Pudding Cheesecake Ice Cream
No-Churn Banana Pudding Cheesecake Ice Cream: A Sweet Family Adventure That's Pure Magic! Three beloved desserts collide in this dreamy frozen treat that kids can help make without any fancy equipment!
Imagine combining the comfort of banana pudding, the richness of cheesecake, and the joy of homemade ice cream – all without an ice cream maker! This incredible no-churn ice cream brings together everything families love about classic desserts into one spoonful of pure happiness. Best of all, your little kitchen helpers can be involved in almost every step of this delicious adventure.
Why Kids Will Love Making This Recipe
This recipe is perfect for young chefs because it involves lots of their favorite kitchen activities: whipping cream (so satisfying!), layering ingredients like building a delicious tower, and the magical anticipation of waiting for something amazing to freeze. Plus, they get to help create something that looks and tastes absolutely restaurant-worthy!
Prep Time: 10 minutes of pure fun
Freeze Time: 8 hours (the hardest part – waiting!)
Total Time: 8 hours 10 minutes
Serves: 8 very happy people
Gather Your Ice Cream Making Team
Equipment You'll Need:
- Stand mixer or hand mixer
- Paring knife (adult use only)
- Cutting board
- Large mixing bowl
- Whisk
- Loaf pan
- Aluminum foil
Parent Tip: This is the perfect recipe to start the night before a special occasion or weekend treat!
Ingredients needed for the banana pudding cheesecake ice cream

- 14 oz sweetened condensed milk
- 2 tsp vanilla extract (or 1 tsp vanilla bean paste for extra flavor)
- 2 cups heavy cream
- 2 tbsp brown sugar
- 1 tsp ground cinnamon
- ⅛ tsp nutmeg
- ⅛ tsp salt
- 2-3 ripe bananas
- 12 Nilla Wafers or Chessman cookies
- 1 container Philadelphia no-bake cheesecake (found in the refrigerated section at Walmart!)
Optional Extras:
- Caramel or butterscotch sauce for drizzling between layers
Let's Create Frozen Magic Together!
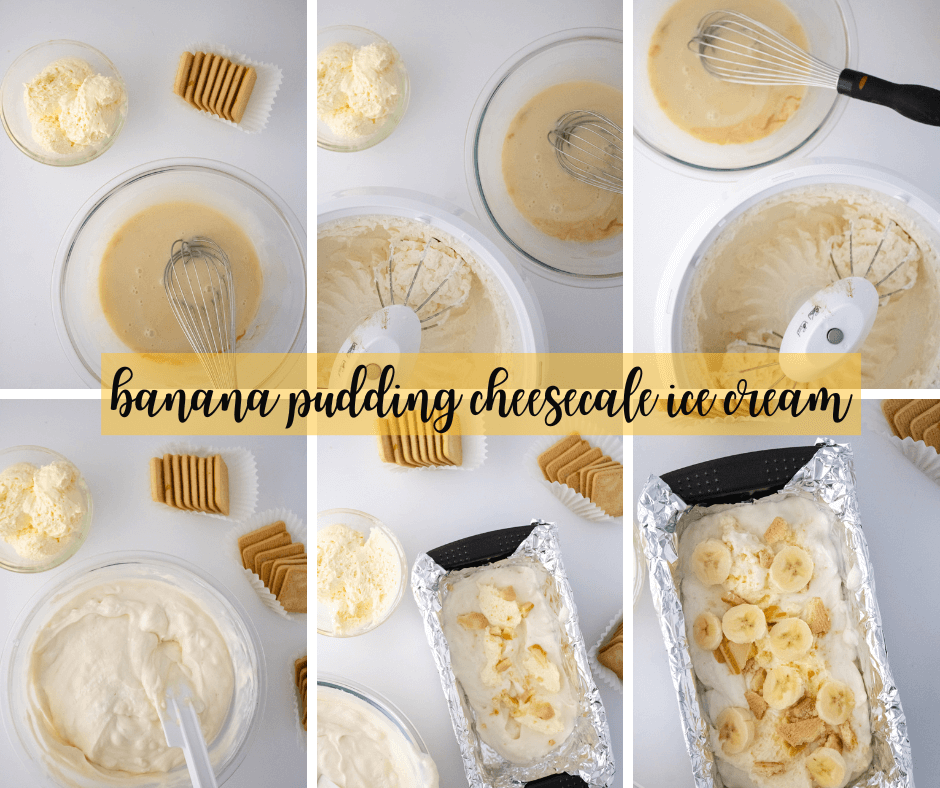
Step 1: Set Up Your Whipping Station
This is where the real kitchen magic begins! Add the heavy cream, brown sugar, cinnamon, nutmeg, and salt to your mixer bowl.
Kids Can Help: Let them measure the spices and sugar. They'll love smelling the cinnamon and learning about how these warm spices make everything taste cozy and delicious.
Teaching Moment: Explain how we're adding spices that remind us of banana pudding and make our ice cream taste extra special!
Step 2: The Whipping Wonder Show
Start your mixer and watch the magic happen! The cream will transform from liquid to fluffy clouds in 4-5 minutes (or 2-3 minutes with a Bosch mixer).
Kids Love Watching: This transformation never gets old! Let them observe as the cream changes texture. They can be your “official whip-checkers” to tell you when it looks like fluffy clouds.
Safety Note: Keep little fingers away from the moving mixer, but let them watch the amazing transformation up close.
Step 3: Create Your Vanilla Base
In a large bowl, whisk together the sweetened condensed milk and vanilla extract until smooth and creamy.
Kids Can Do: This is perfect for little hands! Show them how to whisk in circular motions. They'll love how the vanilla swirls and creates beautiful patterns in the condensed milk.
Fun Fact: Share with your kids that sweetened condensed milk is like regular milk's sweeter, thicker cousin – and it's what makes our ice cream creamy without needing an ice cream maker!
Step 4: The Gentle Folding Technique
Here's where we combine our fluffy whipped cream with the vanilla base. This step requires a gentle touch!
Kids Can Learn: Show them how to “fold” rather than stir. It's like gently hugging the ingredients together instead of mixing them roughly. This keeps our whipped cream light and airy.
Parent Guidance: Demonstrate the folding motion – scooping from the bottom and gently turning over the top until no streaks remain.
Step 5: Prep Your Loaf Pan Like a Pro
Line your loaf pan with aluminum foil using this cool trick: flip the pan upside down, wrap the foil around the outside, then flip it back and nestle the shaped foil inside!
Kids Can Help: They can help with the foil shaping and think it's the coolest trick ever. This makes removal so much easier later!
Why This Works: This technique creates perfectly shaped foil that makes our ice cream easy to remove and slice beautifully.
Step 6: Prepare Your Mix-Ins
While you slice the bananas (adult job), let your kids help prepare the cookies and cheesecake.
Kids Can Do:
- Help break Nilla wafers into chunks (perfect size for little hands)
- Crush Chessman cookies in a sealed bag using a rolling pin or their hands
- Help portion out spoonfuls of the no-bake cheesecake
Texture Talk: Explain to your kids how different cookies create different textures – Nilla wafers stay a bit crunchy, while Chessman cookies become more integrated when crushed.
Step 7: The Layering Adventure
This is where creativity meets deliciousness! Pour ⅓ of your ice cream mixture into the prepared pan.
Kids Love This Part: Let them help drop spoonfuls of cheesecake, arrange banana slices, and sprinkle cookie pieces. It's like building the most delicious tower ever!
Layer by Layer:
- ⅓ of ice cream mixture
- Cheesecake drops, banana slices, cookie pieces
- Another ⅓ of ice cream mixture
- More mix-ins
- Final ⅓ of ice cream mixture
Optional Fun: If using caramel or butterscotch sauce, let kids help drizzle it between layers – they'll love the artistic aspect!
Step 8: The Great Freeze
Cover tightly with foil and freeze for at least 8 hours or overnight. This is definitely the hardest part – the waiting!
Make It Special: Let your kids help write the “ice cream is ready” time on a sticky note for the freezer. Building anticipation is half the fun!
Kitchen Skills Your Kids Will Learn
Measuring Precision: Especially important with spices and liquids Texture Recognition: Understanding different consistencies and when cream is properly whipped Gentle Techniques: Learning the difference between mixing and folding Patience and Planning: Understanding that some amazing things take time Creative Layering: Artistic arrangement and pattern recognition
Serving Ideas That Make It Extra Special
Family Ice Cream Social: Set up toppings like extra cookies, banana slices, and sauces Special Occasion Dessert: Perfect for birthdays, family gatherings, or “just because” celebrations Individual Servings: Scoop into bowls and let everyone add their favorite toppings Ice Cream Sandwiches: Use extra cookies to make ice cream sandwiches!
Pro Tips for Perfect Results
Banana Selection: Use bananas that are ripe but not overly soft – they should still hold their shape when sliced Cookie Texture: Remember that Chessman cookies are best crushed, while Nilla wafers work great in chunks Freezer Space: Make sure you have space in your freezer before you start Easy Removal: The foil lining trick makes slicing and serving so much easier
Troubleshooting with Kids
“The cream isn't getting fluffy!” – Make sure your cream is cold and be patient – it takes a few minutes “I can't fold gently!” – Show them how it's like giving the ingredients a gentle hug, not a rough shake “When will it be ready?” – Use this as a great lesson in patience and delayed gratification
Making It Your Own
Flavor Variations: Try different cookie types or add a layer of chocolate chips Seasonal Twists: Add a sprinkle of pumpkin pie spice in fall, or fresh berries in summer Allergy Adaptations: Use dairy-free alternatives if needed (though texture may vary slightly)
The Magic of No-Churn Ice Cream
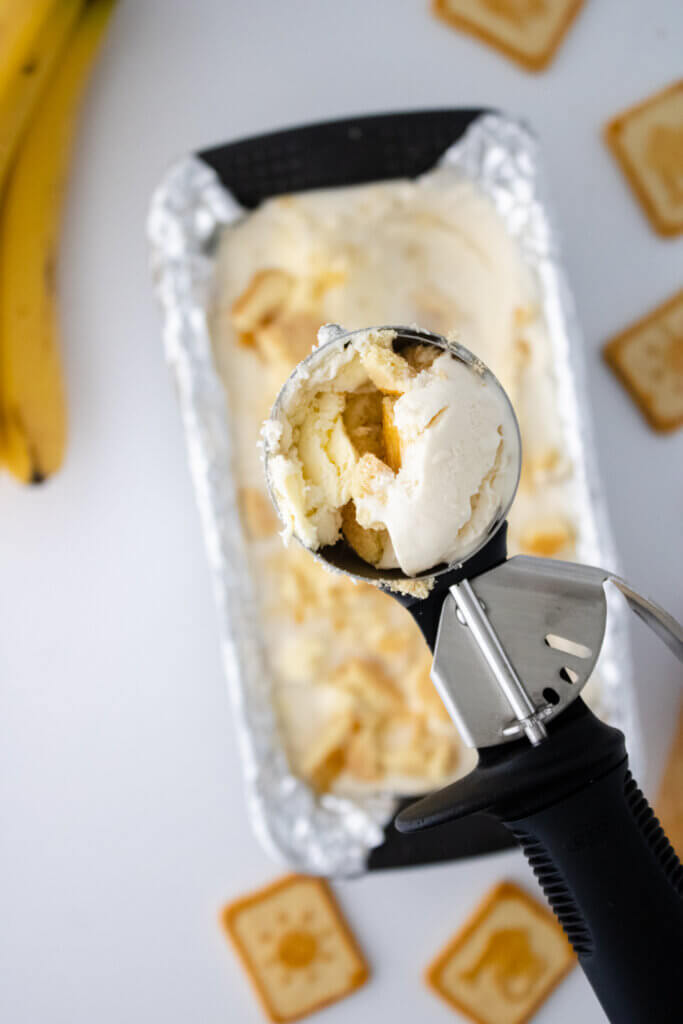
What makes this recipe truly special is that you're creating professional-quality ice cream without any special equipment. The combination of whipped cream and sweetened condensed milk creates that perfect creamy texture that rivals any ice cream shop.
Science for Kids: The fat in the heavy cream and the sugar in the condensed milk work together to prevent ice crystals from forming – that's why it's so smooth and creamy!
Storage Tips
This ice cream keeps beautifully in the freezer for up to 2 weeks (though it rarely lasts that long!). Keep it covered tightly to prevent freezer burn.
Serving Tip: Let it sit out for 5-10 minutes before scooping for the perfect consistency.
Why This Recipe Creates Sweet Memories
There's something absolutely magical about making ice cream from scratch with your kids. The process builds anticipation, teaches patience, and creates something truly special together. When you finally take that first bite of your homemade creation, the pride and joy on your children's faces will be worth every minute of the wait.
The Beautiful Process: From the wonder of watching cream transform into fluffy peaks, to the artistic fun of layering ingredients, to the anticipation of waiting for the final result – every step is an opportunity for connection and learning.
Final Kitchen Fun thoughts
This No-Churn Banana Pudding Cheesecake Ice Cream isn't just a dessert – it's an experience. It's the excitement of creating something amazing together, the science lesson hidden in the kitchen fun, and the sweet reward of patience and teamwork.
The combination of beloved flavors, the hands-on process that kids can fully participate in, and the impressive results make this recipe a true family favorite. You're not just making ice cream; you're making memories, building confidence, and proving that some of the most amazing treats can be created right in your own kitchen.
So gather your little ice cream makers, clear some freezer space, and get ready for a sweet adventure that will have everyone asking, “Can we make this again tomorrow?”
Share your ice cream creations with us! We love seeing your family's frozen masterpieces and hearing about the sweet memories you're creating together in the kitchen.
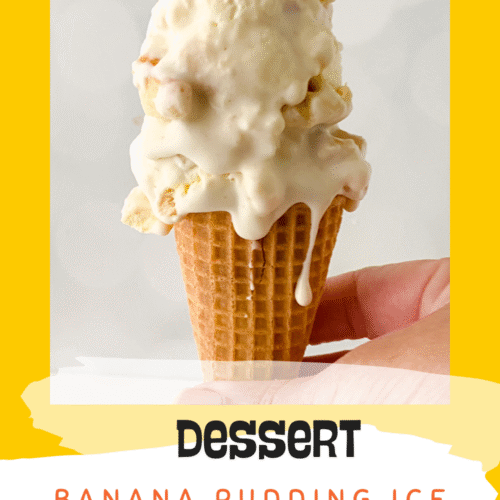
Banana Pudding Cheesecake Icecream
Equipment
- Mixer (Hand or Stand)
- Pairing knife
- Cutting Board
- Large bowl
- Whisk
- Loaf pan
- Aluminum Foil
Ingredients
- 14 oz sweetened condensed milk
- 2 tsp vanilla extract or 1 tsp vanilla bean paste
- 2 cups heavy cream
- 2 tablespoons brown sugar
- 1 tsp cinnamon
- 1/8 tsp nutmeg
- 1/8 tsp salt
- 2-3 bananas optional
- 12 Nilla Wafers or Chessman Cookies
- Philadelphia no bake cheesecake
Instructions
- Add 2 cups heavy cream, brown sugar, cinnamon, nutmeg and salt to a stand mixer and mix until whipped (4-5 mins or if you’re using a Bosch 2-3 mins)
- In a large bowl whisk together sweetened condensed milk and vanilla extract.
- Fold the whipped cream into the condensed milk mixture until no streaks of color are present.
- Pour 1/3 of the mixture into a foil lined bread pan (see notes)
- Add sliced drops of no bake cheesecake, bananas and cookies
- Repeat with mixture, bananas and cookies.
Notes
Other things that can be added are caramel or butterscotch drizzle between the layers.
TIP: Flip your bread pan upside down and place the foil on the outside of it. Then flip it over and place the foil inside.
Cheeseman Cookies are best crushed as opposed to chopped, Nilla wafer work well as chunks, just keep this in mind while making it, if you have texture issues just don’t leave any large chunks of cookies.