Winter Wonderland Cocoa Bomb Cups
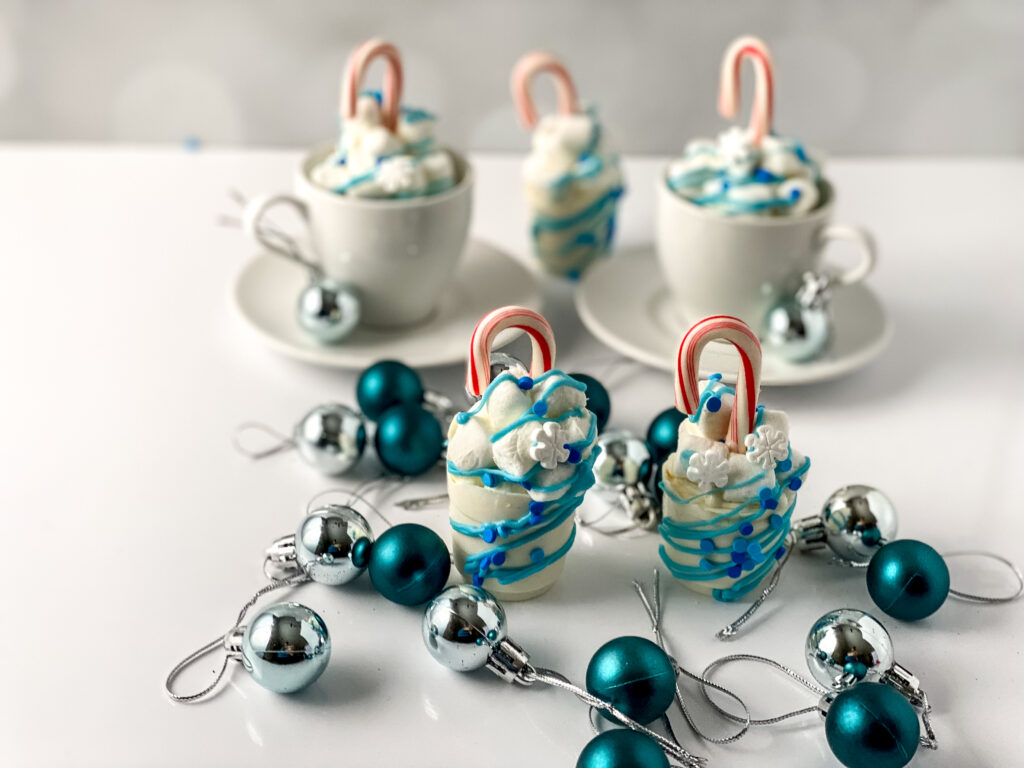
Here is another recipe to warm up your holiday season. Take a look at this winter wonderland cocoa bomb cups recipe and see how it’s done. I am sure that it will make your holiday cup extra special.

All About Winter Wonderland Cocoa Bomb Cups
Well, whenever we hear the words winter wonderland, we are being reminded of a very beautiful and exciting place. Usually, they are being visited during the holiday season.
However, with the global health crisis that we are experiencing, we might rather choose to stay safe and create our own winter wonderland at home with our families. This year, our winter wonderland could be our home, our food, or our cup of hot chocolate or coffee. They might be different, but these bring the same feeling of beauty and excitement.
In the same manner, this recipe of cocoa bomb cups can bring you fun and excitement as you do them and a relaxing experience as you drink them. With just a few ingredients and a variety of steps to follow, you can your very own winter wonderland cocoa bomb cups to enjoy this Christmas.

Equipment and Ingredients to Prepare
To make your bomb cups, there are some tools to prepare before you can begin. Here are the following:
- 2 oz disposable cups. This will be your molder of the bomb cups.
- Xacto Knife. You will use this to slice the cups and I personally recommend this knife.
- Piping bag. This will be used for the candy melt as you decorate. You can have my personal recommendation of piping bags here.
- Scissors. Used for cutting the edges or for clearing.
- Cutting board. This will be used for sanitation so you won’t be cutting directly to your tile.
- Small microwaveable bowls. Used as containers of the candy melts. I recommend you to have these silicone melting bowls here or this.
Likewise, these are the ingredients of the cocoa bomb cups:
- White candy melts almond bark or melting wafers. You will need 2 oz for every cup that you make.
- Blue candy melts. You will need 1 oz for every cup.
- Mini marshmallows. Prepare 7 to 10 pieces.
- holiday sprinkles. This is optional.
- Mini Candy cane. One for every cup.

How to Make the Winter Wonderland Cocoa Bomb Cups
To make the cocoa bomb cups, begin by melting down chocolates according to package instructions, do not over melt they can burn. If you need to thin out the green melts add a small amount of coconut oil until it’s a pourable consistency.
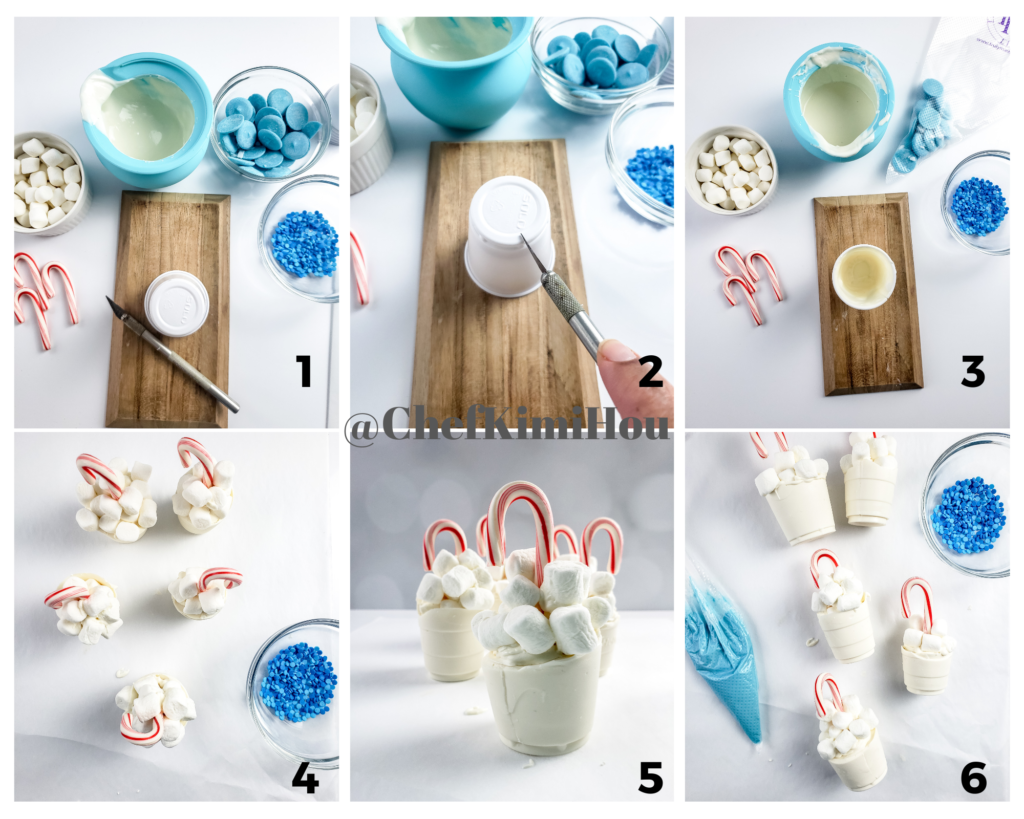
Next, place the plastic cups upside down on a cutting board and using the Xacto knife cut a line down the of the cup. Pour chocolate into the cups and twist the cup as you do this to fully cover the entire thing.
Then, turn the cup upside down on a piece of parchment to allow any extra chocolate to drip off and cover the fullness of the cup Place the cup in the freezer for 7 to 9 minutes to set.
After that, remove it from the freezer and add more melted chocolate on top of that filling it 3/4 full. Return to the freezer to harden for 18 to 25 minutes. Turn the cup upside down on your cutting board and make cuts in the rim of the cup all the way around it.
Carefully, peel off the cup, starting at the original long slit on the side. Once the chocolate is released from the cup turn it right side up and add a small amount of melted chocolate to the top, add mini marshmallows, peppermint sticks, and sprinkles.
Lastly, use melted blue chocolate in a piping bag to “glue” on sprinkles and additional marshmallows. Return to the freezer for a final set, for about 7 to 8 minutes. You’re done!
Option to Create Cups with Hot Chocolate
If you want to create a cup with chocolate, do this. Instead of filling the cavity up with chocolate add 1 tbsp cocoa powder and then fill it 3/4 full with melted chocolate. Return to the freezer for 15 minutes.
Then, turn the cup upside down on your cutting board and make cuts in the rim of the cup all the way around it. Carefully, peel off the cup, starting at the original long slit on the side, and once the chocolate is released from the cup turn it right side up.
After that, add a small amount of melted chocolate to the top, add mini marshmallows, peppermint sticks, and sprinkles. Use melted white chocolate in a piping bag to “glue” on sprinkles and additional marshmallows. Finally, return to the freezer for a final set, for about 7 to 8 minutes. The fastest way to melt the chocolate is by using really hot milk.
Troubleshooting Guide
As your Chef, I have some tips for you in case you will encounter difficulties along the way. First is the cracks that may occur when unmolding. If just the top of it breaks you can hide it, smooth it out, add more melted chocolate, and top with marshmallows.
Next, the shell breaks completely no way to save it? Melting it back down and try again. This had about a 90% success rate. The more you do the better they are. Depending on your chocolate medium, whether it is melting wafers, candy melts, or almond bark, some cups will be thicker than others and more sturdy.

Winter Wonderland Cocoa Bomb Cups
Equipment
- 2 oz disposable cups
- Xacto Knife
- Piping Bag
- Scissors
- Cutting Board
- Small microwaveable bowls
Ingredients
- 2 oz white candy melts almond bark or melting wafers.
- 1 oz blue candy melts
- 7-10 mini marshmallows
- holiday sprinkles optional
- Mini Candy cane
Instructions
- Meltdown chocolates according to package instructions, do not over melt they can burn. If you need to thin out the green melts add a small amount of coconut oil until it’s a pourable consistency.
- Place the plastic cups upside down on a cutting board and using the xacto knife cut a line down the of the cup.
- Pour chocolate into the cups.
- Twist the cup as you do this (to full cover the entire thing).
- Turn the cup upside down on a piece of parchment to allow any extra chocolate to drip off and cover the fullness of the cup.
- Place the cup in the freezer for 7-9 mins to set.
- Remove from the freezer.
- Add more melted chocolate on top of that filling it 3/4 full.
- Return to freezer to harden for 18-25 mins
- Turn the cup upside down on your cutting board and make cuts in the rim of the cup all the way around it.
- Carefully, peel off the cup, starting at the original long slit on the side.
- Once the chocolate is released from the cup turn it right side up.
- Add a small amount of melted chocolate to the top, add mini marshmallows, peppermint sticks, and sprinkles.
- Use melted blue chocolate in a piping bag to “glue” on sprinkles and additional marshmallows.
- Return to the freezer for a final set, for about 7-8 mins
- OPTION TO CREATE WITH HOT CHOCOLATE:
- Instead of filling the cavity up with chocolate add 1 tbsp cocoa powder and then fill it 3/4 full with melted chocolate. Return to freezer for 15 mins.
- Then turn the cup upside down on your cutting board and make cuts in the rim of the cup all the way around it.
- Carefully, peel off the cup, starting at the original long slit on the side.
- Once the chocolate is released from the cup turn it right side up
- Once the chocolate is released from the cup turn it right side up.
- Add a small amount of melted chocolate to the top, add mini marshmallows, peppermint sticks, and sprinkles.
- Use melted white chocolate in a piping bag to “glue” on sprinkles and additional marshmallows.
- Return to the freezer for a final set, for about 7-8 mins
- The fastest way to melt the chocolate is by using really hot milk.