Daisy Rice Krispy Treats-As seen on LynnLilly
Rice Krispies are one of the go-to desserts for everyone. Here is a recipe that’s perfect for kids' engagement, the Daisy Rice Krispy Treats! Very colorful treats in pastel colors that everyone will surely love. Try now!

What is a Daisy Rice Krispy Treat?
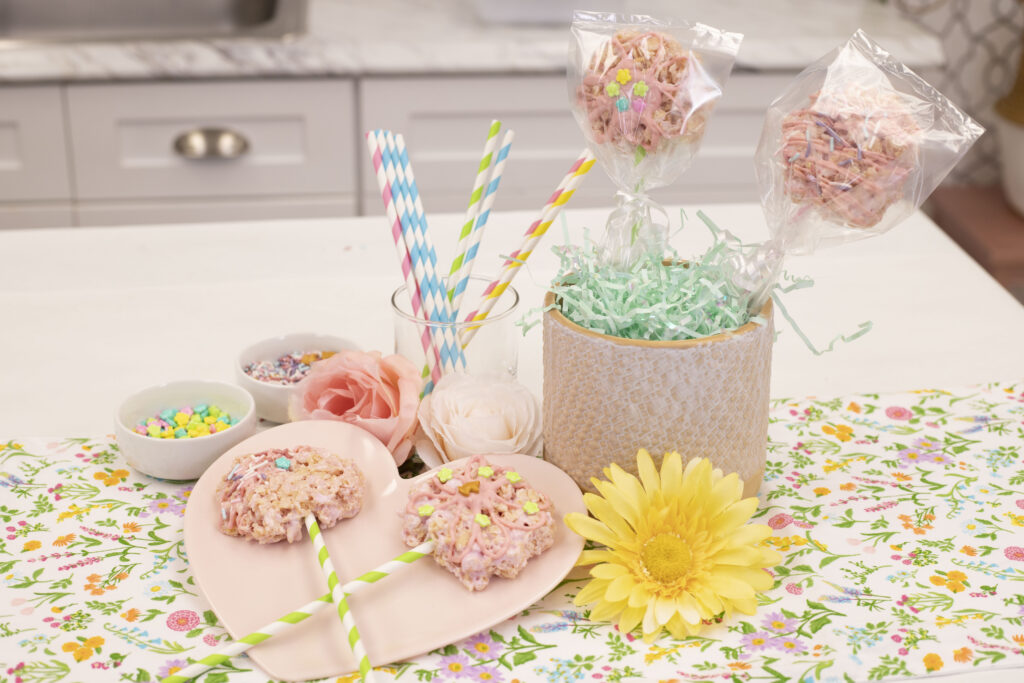
Generally, the Daisy Rice Krispy Treats recipe is made out of crisped rice in beautiful colors shaped in a daisy-like flower. They are sweet and very attractive to the eyes. Kids would really have fun with this dessert.
Furthermore, this recipe is fun and easy to make. The ingredients and equipment needed are just a few and easy to find. Surely, it will not only allow to have an easy preparation but also a fun process doing it.
Subsequently, this is not only a fun activity to do with the kids that can create a yummy dessert, but it can also serve as your gift on an occasion. Regardless of its purpose, you will never go wrong trying out Daisy Rice Krispy Treat.
How Long Does it take to make these?
Generally, it will take you 30 minutes in total to make 10 to 12 pieces of daisy rice Krispy treats. To be specific, you will devote 8 minutes for preparation time, 15 minutes for rest time, and 10 minutes for decorating.
What Equipment Should You Prepare?
Ideally, you need the following types of equipment for this recipe:
- 8*8 or 11*13 pan, where mixing of rice Krispies will be done.
- Parchment Paper, to line the dish.
- Nonstick spray, just to make sure that rice Krispies won’t stick to the parchment paper.
- Daisy Cookie Cutter, as the molder of the daisy Rice Krispies.
- Gel Food Colors, to give the rice Krispies colors.
- Paper Drinking Straws, to be the handle of the dessert.
- 2-3 medium-sized microwaveable bowls, where colored chocolate will be melted.
I have personal recommendations of the equipment to use, which you can access by just clicking the name of the equipment. Once clicked, you will be redirected to Amazon for purchase.
What Ingredients Should You Set?
Likewise, just as how you prepare the equipment, you also need to set the ingredients for the recipe. And they are the following:
- Mini marshmallows. Use 1 box of 10 ounces.
- Rice cereal. Prepare 6 cups.
- Unsalted butter. Set 3 tablespoons.
- Gel Colors. Prepare 2 to 3 colors, you can have your preferred colors too.
- Candy coating pieces. Use 8 to 10 candies for colors to make sure it is enough.
- 2-3 piping bags. Set 2 to 3 bags as well or depending on the number of colors used.
Using this amount of ingredients, it can yield 10 to 12 flowers in total.

How to Make the Daisy Rice Krispy Treat?
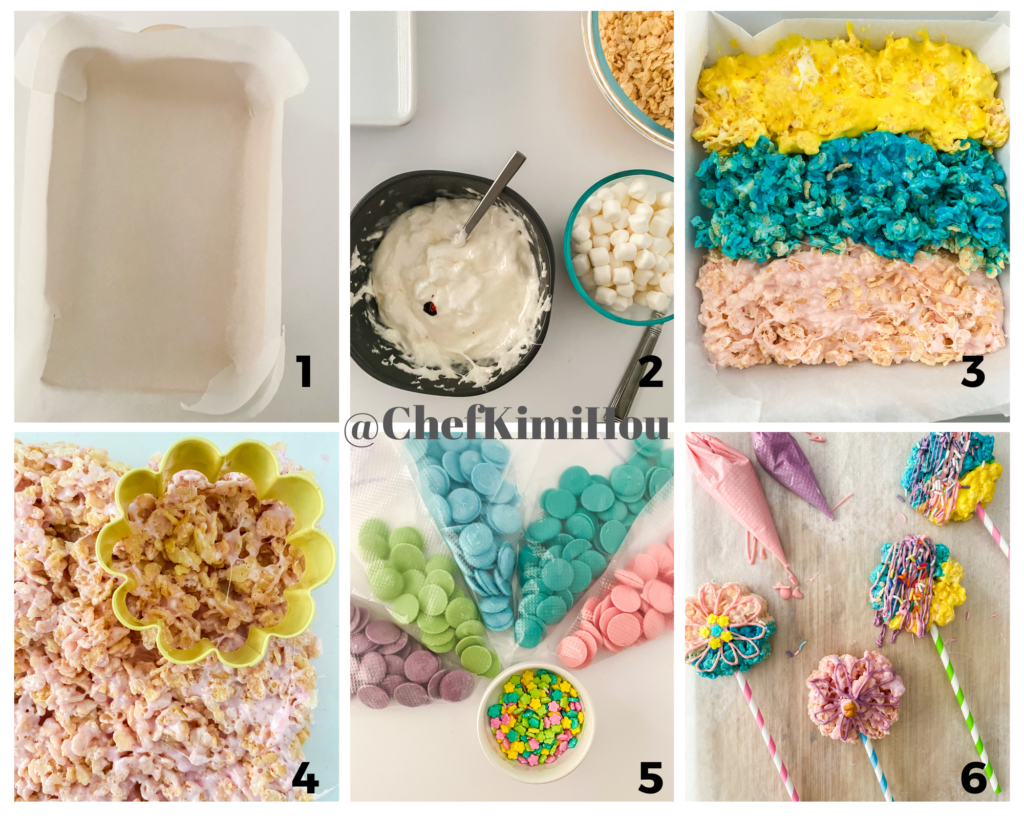
First, you need to settle the dish. Line the dish with parchment paper, spray with nonstick and set aside.
Next, you need to prepare the marshmallows. Do this by separating the marshmallows evenly in 2 or 3 bowls or depending on how many colors you choose. Then, add one tablespoon unsalted butter to each of the bowls of marshmallows and heat bowls one at a time for 45 seconds on high. Continue stirring, then return to microwave for an additional 15 to 20 seconds. Remove, stir and add 1 drop of gel food coloring and mix fully then add 2 to 3 cups of rice cereal. Pour into dish, repeat with other colors.
Once all colors are in the dish, use a second sheet of parchment to press down the cereal treats and make it leveled. Also, allow to set for at least ten minutes in the fridge and remove parchment from the container. Lightly spray cookie cutter with non stick spray then press straight down into the rice cereal treats and slide a paper straw into the flower.
Subsequently, add each color candy melts to individual piping bags, melt them and press the chocolate in the bags to make sure they are all melted. Finally, snip a small hole into the bottom of the piping bags, decorate the pops and immediately add sprinkles. You are done! If you desire to pack them, allow to fully set 30 to 45 mins before doing so.
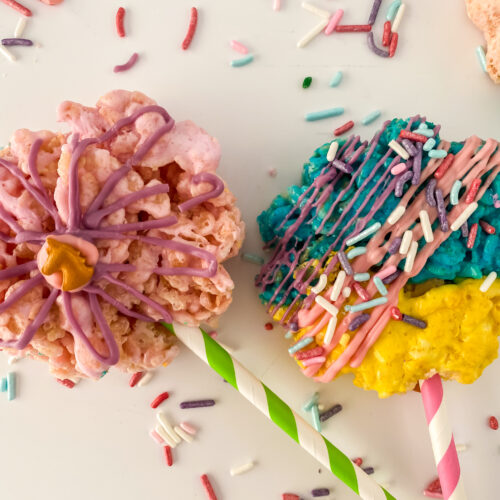
Daisy Rice Krispy Treats
Equipment
- 8*8 or 11*13 pan
- Parchment Paper
- Non stick spray
- Daisy Cookie Cutter
- Gel Food Colors
- Paper Drinking Straws
- 2-3 medium sized microwaveable bowls
Ingredients
- 1 10 oz bag mini marshmallows
- 6 cups rice cereal
- 3 tbsp unsalted butter
- 2-3 Gel Colors
- 8-10 candy coating pieces per color
- 2-3 piping bags
Instructions
- Line dish with parchment paper, spray with nonstick and set aside.
- Separate the marshmallows evenly in 2 or 3 bowls (depending on how many colors you choose).
- Add one tbsp unsalted butter to each of the bowls of marshmallows.
- Heat bowls one at a time for 45 seconds on HIGH.
- Stir then return to microwave for an additional 15-20 seconds.
- Remove, stir and add 1 drop of gel food coloring.
- Mix fully then add 2-3 cups of rice cereal (2 cups if 3 colors, 3 cups if 2 colors)
- Pour into dish, repeat with other colors.
- Once all colors are in the dish, use a second sheet of parchment to press down the cereal treats and make it leveled.
- Allow to set for at least ten minutes in the fridge.
- Remove parchment from the container.
- Lightly spray cookie cutter with non stick spray then press straight down into the rice cereal treats.
- Slide a paper straw into the flower (if it wont stick, dip it in melted chocolate and slide into treat).
- Add each color candy melts to individual piping bags.
- Melt on HIGH for 30 seconds.
- Flip the bags over and microwave for another 30 secs.
- Press the chocolate in the bags to make sure they are all melted.
- Snip a small hole into the bottom of the piping bags.
- Decorate the pops and immediately add sprinkles.
- If packing: Allow to fully set 30-45 mins before packaging.